并行计算框架JPPF3.3.4试用
先说一个挺有意思的事情,就在OneCoder准备记录试用过程的时候,给大家截图下载页面的时候,发现最新版本变成3.3.4了。于是,我也只好重新下载了:)
关于JPPF的介绍,可访问其官网:http://www.jppf.org
下载页面:http://www.jppf.org/downloads.php
想要运行JPPF并行计算任务,需要至少一个Node节点(执行任务的节点),一个driver节点(调度任务的节点),和本地调用节点
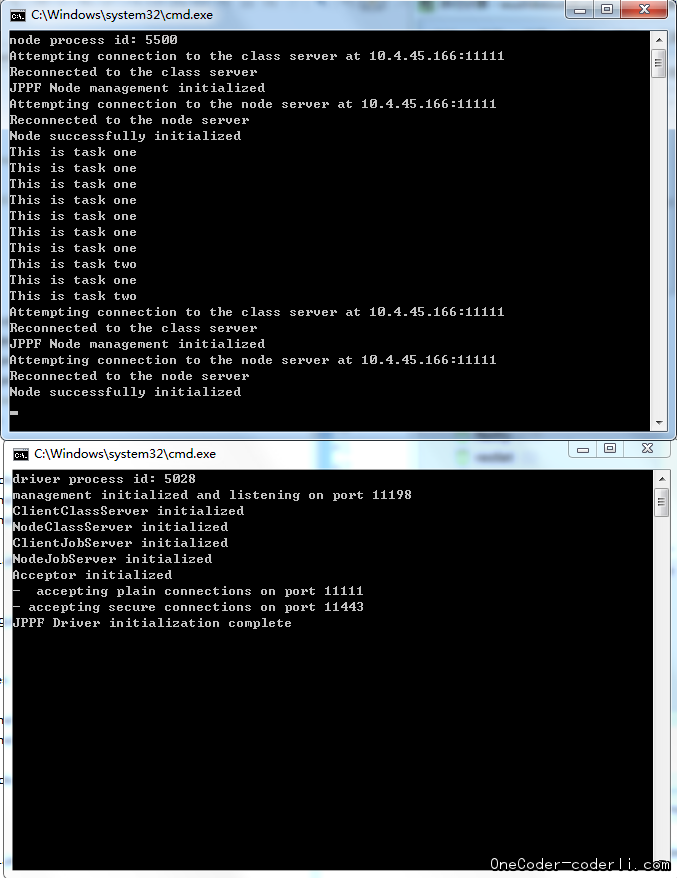
依次分别运行driver包里的startDriver.bat和node包里的startNode.bat启动driver和node
然后,开发jppf应用,JPPF在application-template包中提供了任务模版,只需参照文档稍作修改即可:
1
2
3
4
5
6
7
8
9
10
11
12
13
14
15
16
17
18
19
20
21
22
23
24
25
26
27
28
29
30
31
32
33
34
35
36
37
 public static void main(String args[]) {
           TaskFlowOne taskOne = new TaskFlowOne();
            try {
                 // create the JPPFClient. This constructor call causes JPPF to read
                 // the configuration file
                 // and connect with one or multiple JPPF drivers.
                 jppfClient = new JPPFClient();
                 // create a JPPF job
                JPPFJob job = new JPPFJob();
                 // give this job a readable unique id that we can use to monitor and
                 // manage it.
                job.setName( "Template Job Id");
                 // add a task to the job.
                job.addTask(taskOne);
                job.setBlocking( true);

                 // Submit the job and wait until the results are returned.
                 // The results are returned as a list of JPPFTask instances,
                 // in the same order as the one in which the tasks where initially
                 // added the job.
                List<JPPFTask> results = jppfClient.submit(job);
                JPPFTask jTask = results.get(0);
                System. out.println(jTask.getResult());
                 // process the results
                TaskFlowTwo taskTwo = new TaskFlowTwo();
                job.addTask(taskTwo);
                job.setBlocking( true);
                List<JPPFTask> resultsTow = jppfClient.submit(job);
                JPPFTask jTaskTow = resultsTow.get(1);
                System. out.println(jTaskTow.getResult());
           } catch (Exception e) {
                e.printStackTrace();
           } finally {
                 if ( jppfClient != null)
                      jppfClient.close();
           }
     }
一个并行计算的任务,就是一个JPPFJob,每个job含有多个task,task之间是并行执行的,如果有多个nod节点,会按照其负载均衡策略分配到多个node上执行。通过client提交(submit)job后,会返回执行结果,为一个JPPFTask列表,列表里包含你add到job中每个task及其运行结果,作为后续计算处理之用。任务调用支持阻塞和非阻塞。
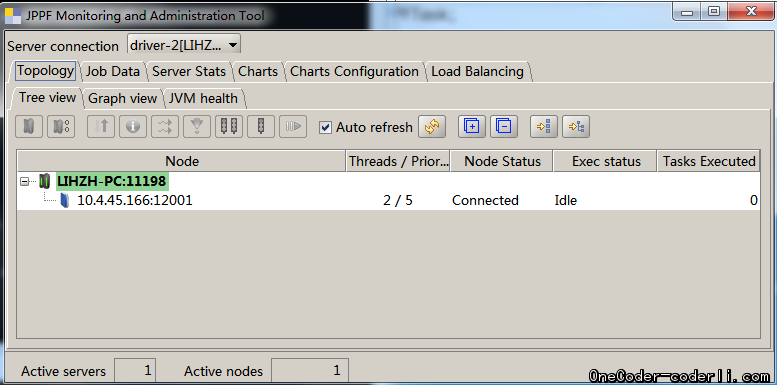
admin-ui中还提供了对节点状态和资源占用,任务信息等监控,总体来说上手很快,很好用:
本文由作者按照 CC BY-NC-SA 4.0 进行授权

